本文带你了解如何使用 Python 中的内置套接字和线程库构建一个简单的聊天室应用程序,该应用程序接受多个连接的客户端。
如何用Python制作聊天应用程序?聊天室是一个界面,允许两个或更多人聊天并向房间中的每个人发送消息。在本教程中,你将学习如何构建一个简单的聊天室服务器并允许多个客户端使用 Python 中的套接字连接到它。
我们将使用Python 内置的socket 模块,它为我们提供了在 Internet 上广泛使用的 socket 操作,因为它们支持与任何网络的任何连接。
Python如何制作聊天应用程序?首先,为了更改文本颜色,我们需要colorama包来为聊天室中的每个客户端分配打印颜色:
pip3 install coloramaPython聊天应用程序实现示例:既然我们使用的是套接字,那么我们需要一个服务器和客户端代码,让我们从服务器端开始。
服务器代码
如何用Python制作聊天应用程序?在我们的架构中,服务器的整个工作是做两个基本操作:
- 侦听即将到来的客户端连接,如果连接了新客户端,我们将其添加到我们的客户端套接字集合中。
- 为每个连接的客户端启动一个新线程,该线程不断侦听从客户端发送的即将到来的消息并将其广播给所有其他客户端。
下面的代码创建一个TCP套接字并将其绑定到服务器地址,然后侦听即将到来的连接:
import socket
from threading import Thread

# server's IP address
SERVER_HOST = "0.0.0.0"
SERVER_PORT = 5002 # port we want to use
separator_token = "<SEP>" # we will use this to separate the client name & message

# initialize list/set of all connected client's sockets
client_sockets = set()
# create a TCP socket
s = socket.socket()
# make the port as reusable port
s.setsockopt(socket.SOL_SOCKET, socket.SO_REUSEADDR, 1)
# bind the socket to the address we specified
s.bind((SERVER_HOST, SERVER_PORT))
# listen for upcoming connections
s.listen(5)
print(f"[*] Listening as {SERVER_HOST}:{SERVER_PORT}")
请注意,我使用了“0.0.0.0”作为服务器 IP 地址。这意味着本地机器上的所有 IPv4 地址。你可能想知道,为什么我们不只使用 localhost 或"127.0.0.1"?好吧,如果服务器有两个 IP 地址,让我们说一个网络上的“192.168.1.2”和另一个网络上的“10.0.0.1”,那么服务器在这两个网络上都侦听。
我们还没有接受连接,因为我们没有调用accept()方法,下面的代码完成了服务器代码配方:
def listen_for_client(cs):
    """
    This function keep listening for a message from `cs` socket
    Whenever a message is received, broadcast it to all other connected clients
    """
    while True:
        try:
            # keep listening for a message from `cs` socket
            msg = cs.recv(1024).decode()
        except Exception as e:
            # client no longer connected
            # remove it from the set
            print(f"[!] Error: {e}")
            client_sockets.remove(cs)
        else:
            # if we received a message, replace the <SEP>
            # token with ": " for nice printing
            msg = msg.replace(separator_token, ": ")
        # iterate over all connected sockets
        for client_socket in client_sockets:
            # and send the message
            client_socket.send(msg.encode())

while True:
    # we keep listening for new connections all the time
    client_socket, client_address = s.accept()
    print(f"[+] {client_address} connected.")
    # add the new connected client to connected sockets
    client_sockets.add(client_socket)
    # start a new thread that listens for each client's messages
    t = Thread(target=listen_for_client, args=(client_socket,))
    # make the thread daemon so it ends whenever the main thread ends
    t.daemon = True
    # start the thread
t.start()Python如何制作聊天应用程序?如前所述,我们将连接的客户端套接字添加到我们的套接字集合中,然后我们启动一个新线程并将其设置为守护线程(有关守护线程的更多信息,请查看本教程)来执行我们定义的listen_for_client()函数,它给定一个客户端套接字,它等待使用recv()方法发送消息,如果是,则将其发送给所有其他连接的客户端。
最后,让我们关闭所有套接字:
# close client sockets
for cs in client_sockets:
    cs.close()
# close server socket
s.close()
好的,这就是服务器代码,让我们深入研究客户端代码。
客户代码
Python聊天应用程序实现示例:客户端执行三个基本操作:
- 连接到服务器。
- 继续侦听来自服务器的消息(必须是客户端向服务器发送消息并且服务器将其广播)并将其打印到控制台。
- 等待用户输入消息发送到服务器。
这是第一个操作的代码:
import socket
import random
from threading import Thread
from datetime import datetime
from colorama import Fore, init, Back

# init colors
init()

# set the available colors
colors = [Fore.BLUE, Fore.CYAN, Fore.GREEN, Fore.LIGHTBLACK_EX,
    Fore.LIGHTBLUE_EX, Fore.LIGHTCYAN_EX, Fore.LIGHTGREEN_EX,
    Fore.LIGHTMAGENTA_EX, Fore.LIGHTRED_EX, Fore.LIGHTWHITE_EX,
    Fore.LIGHTYELLOW_EX, Fore.MAGENTA, Fore.RED, Fore.WHITE, Fore.YELLOW
]

# choose a random color for the client
client_color = random.choice(colors)

# server's IP address
# if the server is not on this machine,
# put the private (network) IP address (e.g 192.168.1.2)
SERVER_HOST = "127.0.0.1"
SERVER_PORT = 5002 # server's port
separator_token = "<SEP>" # we will use this to separate the client name & message

# initialize TCP socket
s = socket.socket()
print(f"[*] Connecting to {SERVER_HOST}:{SERVER_PORT}...")
# connect to the server
s.connect((SERVER_HOST, SERVER_PORT))
print("[+] Connected.")
作为附带操作,我们还为每个客户端设置了一种颜色,你将在输出中看到它。另外,让我们为每个客户端设置一个名称,以便我们可以区分客户端:
# prompt the client for a name
name = input("Enter your name: ")
下面的代码负责第二个操作;继续监听来自服务器的消息并将它们打印到控制台:
def listen_for_messages():
    while True:
        message = s.recv(1024).decode()
        print("\n" + message)

# make a thread that listens for messages to this client & print them
t = Thread(target=listen_for_messages)
# make the thread daemon so it ends whenever the main thread ends
t.daemon = True
# start the thread
t.start()
我们还希望它作为守护线程位于一个单独的线程中,这样我们就可以在侦听消息的同时做其他事情。
如何用Python制作聊天应用程序?现在让我们做最后的任务;等待用户输入消息,然后将它们发送到服务器:
while True:
    # input message we want to send to the server
    to_send =  input()
    # a way to exit the program
    if to_send.lower() == 'q':
        break
    # add the datetime, name & the color of the sender
    date_now = datetime.now().strftime('%Y-%m-%d %H:%M:%S')
    to_send = f"{client_color}[{date_now}] {name}{separator_token}{to_send}{Fore.RESET}"
    # finally, send the message
    s.send(to_send.encode())

# close the socket
s.close()我们将客户端颜色,名称和当前日期时间添加到要发送的消息中,我们发送消息使用send()方法,我们通过'q'在消息位置输入字符来退出问题。
Python聊天应用程序实现示例
Python如何制作聊天应用程序?好了,现在我们完成了两个代码配方,让我们进行演示。首先,让我们运行一个且只有一个服务器实例:
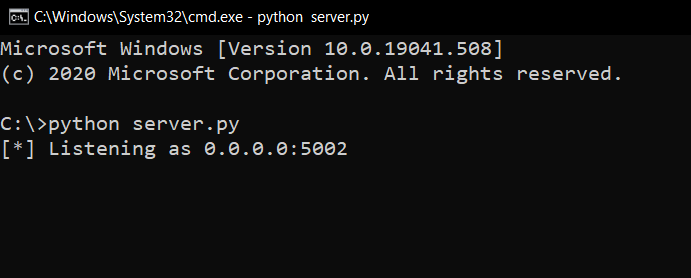
太棒了,服务器正在侦听即将到来的客户端连接,让我们尝试运行一个客户端实例:
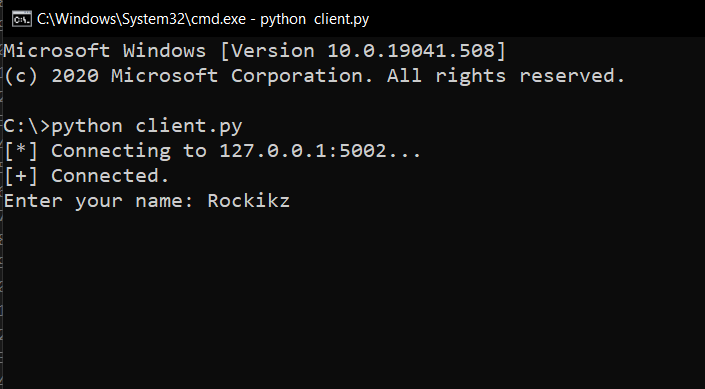 Python聊天应用程序实现示例:现在客户端连接到服务器并提示输入用户名,以确保它已连接,返回服务器控制台,你将看到它确实已连接:
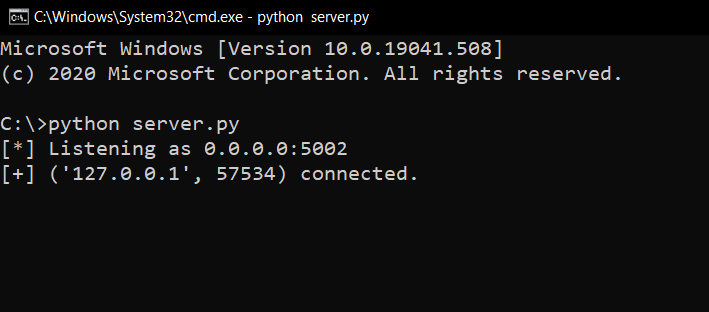 请注意,我们现在在 localhost ( 127.0.0.1 ) 地址上,因为它是同一台机器,但是如果你想从同一网络中的其他机器连接,你也可以这样做,只需确保更改
SERVER_HOST客户端代码从127.0.0.1到服务器的私有 IP 地址。
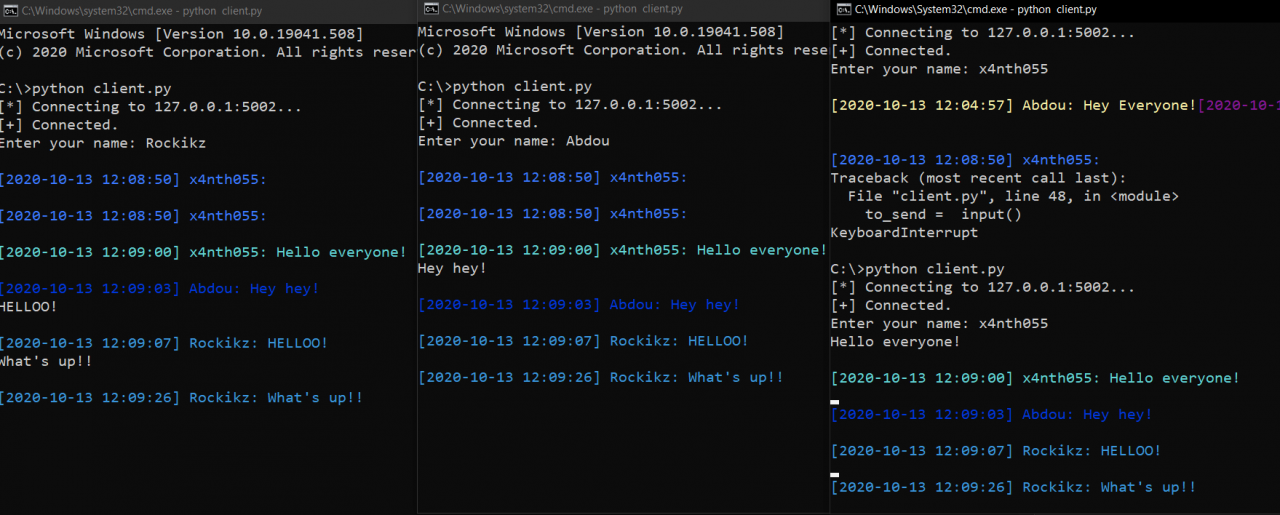
让我们运行另一个客户端,以便我们可以聊天:
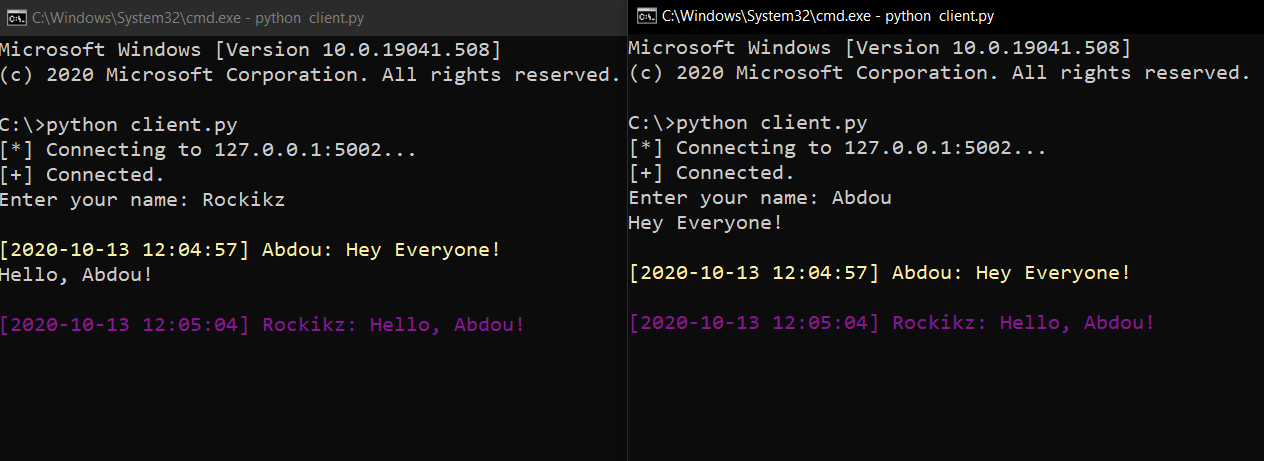
太棒了,正如你所看到的,每个客户端都有一个颜色,所以我们可以区分用户,让我们运行第三个客户端来玩得开心:
结论
Python如何制作聊天应用程序?现在从特定客户端发送的每条消息都会发送到所有其他客户端。请注意,每当你重新执行client.py脚本时,颜色都会更改。
请检查完整代码,以便你可以轻松地自己运行它们!
我鼓励你为该程序添加更多功能。例如,你可以在连接新客户端时向所有用户发出通知!

