Python如何生成和读取二维码?本文带你学习如何使用 qrcode 和 OpenCV 库在 Python 中生成和读取二维码。
二维码是一种矩阵条码,它是一种机器可读的光学标签,其中包含有关其所附物品的信息。实际上,二维码通常包含指向网站或应用程序等的定位器、标识符或跟踪器的数据。
如何在Python中生成和读取二维码?在本教程中,根据一些Python生成和读取二维码示例,你将学习如何使用qrcode和OpenCV库在 Python 中生成和读取二维码。
安装所需的依赖项:
pip3 install opencv-python qrcode numpy生成二维码
Python如何生成和读取二维码?首先,让我们从生成二维码开始,使用qrcode库基本上很简单:
import qrcode
# example data
data = "https://www.thepythoncode.com"
# output file name
filename = "site.png"
# generate qr code
img = qrcode.make(data)
# save img to a file
img.save(filename)
这将在当前目录中生成一个名为“site.png”的新图像文件,其中包含指定数据的二维码图像(在本例中为该网站 URL),如下所示:

如何在Python中生成和读取二维码?你还可以使用这个库来完全控制使用qrcode.QRCode()该类的QR 码生成,你可以在其中实例化和指定大小、填充颜色、背景颜色和纠错,如下Python生成和读取二维码示例所示:
import qrcode
import numpy as np
# data to encode
data = "https://www.thepythoncode.com"
# instantiate QRCode object
qr = qrcode.QRCode(version=1, box_size=10, border=4)
# add data to the QR code
qr.add_data(data)
# compile the data into a QR code array
qr.make()
# print the image shape
print("The shape of the QR image:", np.array(qr.get_matrix()).shape)
# transfer the array into an actual image
img = qr.make_image(fill_color="white", back_color="black")
# save it to a file
img.save("site_inversed.png")所以在QRCode类的创建中,我们指定了一个version参数,它是一个1到40的整数,控制二维码图片的大小(1是小,21x21矩阵,40是185x185矩阵),但是这个会被覆盖数据不符合你指定的大小。在我们的例子中,它将自动扩展到版本 3。
box_size参数控制二维码的每个框有多少像素,而border控制边框应该有多少框厚。
然后我们使用qr.add_data()方法添加数据,使用方法将其编译为数组qr.make(),然后使用方法制作实际图像qr.make_image()。我们将白色指定为 the fill_color,将黑色指定为 the back_color,这与默认二维码完全相反,请查看:
 图像的形状确实放大了,而不是21x21:
The shape of the QR image: (37, 37)相关: 如何在 Python 中制作条形码阅读器。
阅读二维码
Python如何生成和读取二维码?有很多工具可以读取二维码。但是,我们将为此使用OpenCV,因为它很流行且易于与网络摄像头或任何视频集成。
好的,打开一个新的Python文件,跟我一起来看看我们刚刚生成的图像:
import cv2
# read the QRCODE image
img = cv2.imread("site.png")
幸运的是,OpenCV已经内置了二维码检测器:
# initialize the cv2 QRCode detector
detector = cv2.QRCodeDetector()
我们有图像和检测器,让我们检测和解码该数据:
# detect and decode
data, bbox, straight_qrcode = detector.detectAndDecode(img)
所述detectAndDecode()函数拍摄图像作为输入并对其进行解码以恢复3个值元组:从QR码,所找到的QR代码的四边形的顶点的输出数组解码的数据,以及包含整流和二值化的输出图像二维码。
这里我们只需要data和bbox,bbox会帮我们在图片中绘制四边形,数据会打印到控制台!
我们开始做吧,如下Python生成和读取二维码示例:
# if there is a QR code
if bbox is not None:
    print(f"QRCode data:\n{data}")
    # display the image with lines
    # length of bounding box
    n_lines = len(bbox)
    for i in range(n_lines):
        # draw all lines
        point1 = tuple(bbox[i][0])
        point2 = tuple(bbox[(i+1) % n_lines][0])
        cv2.line(img, point1, point2, color=(255, 0, 0), thickness=2)
如何在Python中生成和读取二维码?cv2.line()函数绘制一条连接两个点的线段,我们从之前用detectAndDecode()解码的bbox数组中检索这些点。我们指定了蓝色((255, 0, 0)是蓝色,因为OpenCV使用BGR颜色)和2 的厚度。
最后,让我们显示图像并在按下某个键时退出:
# display the result
cv2.imshow("img", img)
cv2.waitKey(0)
cv2.destroyAllWindows()
运行此命令后,将打印解码数据:
QRCode data:
https://www.thepythoncode.com
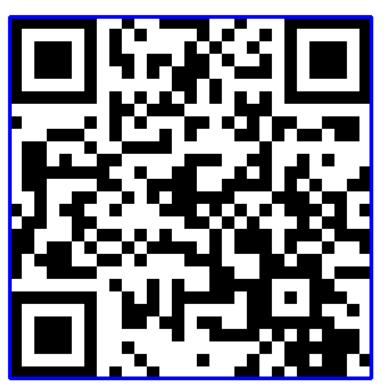
并显示以下图像:

如你所见,蓝线绘制在精确的 QR 码边框中。太棒了,我们已经完成了这个脚本,试着用不同的数据运行它,看看你自己的结果!
请注意,这是二维码的理想选择,而不是条形码,如果你想阅读条形码,请查看专门用于此的教程!
Python如何生成和读取二维码?如果你想使用网络摄像头实时检测和解码 QR 码(我相信你会这样做),请使用以下Python生成和读取二维码示例代码:
import cv2
# initalize the cam
cap = cv2.VideoCapture(0)
# initialize the cv2 QRCode detector
detector = cv2.QRCodeDetector()
while True:
    _, img = cap.read()
    # detect and decode
    data, bbox, _ = detector.detectAndDecode(img)
    # check if there is a QRCode in the image
    if bbox is not None:
        # display the image with lines
        for i in range(len(bbox)):
            # draw all lines
            cv2.line(img, tuple(bbox[i][0]), tuple(bbox[(i+1) % len(bbox)][0]), color=(255, 0, 0), thickness=2)
        if data:
            print("[+] QR Code detected, data:", data)
    # display the result
    cv2.imshow("img", img)
    if cv2.waitKey(1) == ord("q"):
        break
cap.release()
cv2.destroyAllWindows()
太棒了,我们完成了本教程,你现在可以将其集成到你自己的应用程序中!
查看qrcode 的官方文档。

