来,亲眼看看,使用 OpenCV 裁剪图像是如何工作的。python如何裁切照片?首先,我们为什么需要裁剪?python照片裁切是为了从图像中删除所有不需要的对象或区域。甚至突出显示图像的特定特征。
如何使用OpenCV裁剪图像?没有使用 OpenCV 进行裁剪的特定功能,NumPy 数组切片就是这项工作。读入的每个图像都存储在 2D 数组中(对于每个颜色通道)。只需指定要裁剪区域的高度和宽度(以像素为单位)。它完成了!
- 使用 OpenCV 裁剪
- 将图像分成小块
- 有趣的应用
- 概括
以下python照片裁切示例代码片段展示了如何使用 Python 和 C++ 裁剪图像。在这篇文章中,你将详细了解这些内容。
Python
# Import packages
import cv2
import numpy as np

img = cv2.imread('test.jpg')
print(img.shape) # Print image shape
cv2.imshow("original", img)

# Cropping an image
cropped_image = img[80:280, 150:330]

# Display cropped image
cv2.imshow("cropped", cropped_image)

# Save the cropped image
cv2.imwrite("Cropped Image.jpg", cropped_image)

cv2.waitKey(0)
cv2.destroyAllWindows()
C++
// Include Libraries
#include<opencv2/opencv.hpp>
#include<iostream>

// Namespace nullifies the use of cv::function();
using namespace std;
using namespace cv;

int main()
{
	// Read image
	Mat img = imread("test.jpg");
	cout << "Width : " << img.size().width << endl;
	cout << "Height: " << img.size().height << endl;
	cout<<"Channels: :"<< img.channels() << endl;
	// Crop image
	Mat cropped_image = img(Range(80,280), Range(150,330));

	//display image
	imshow(" Original Image", img);
	imshow("Cropped Image", cropped_image);

	//Save the cropped Image
	imwrite("Cropped Image.jpg", cropped_image);

	// 0 means loop infinitely
	waitKey(0);
	destroyAllWindows();
	return 0;
}
我们假设你的系统中已经有 OpenCV。如果你需要安装 OpenCV,请访问下面的相关链接。
- 在 Windows 上安装 OpenCV
- 在 MacOS 上安装 OpenCV
- 在 Ubuntu 上安装 OpenCV
Python
# Importing the cv2 library
import cv2
C++
#include<opencv2/opencv.hpp>
#include<iostream>

// Namespace nullifies the use of cv::function();
using namespace std;
using namespace cv;
上面的代码分别导入了 Python 和 C++ 中的 OpenCV 库。
使用 OpenCV 裁剪 - python照片裁切

Python:
img=cv2.imread('test.png')

# Prints Dimensions of the image
print(img.shape)

# Display the image
cv2.imshow("original", img)
cv2.waitKey(0)
cv2.destroyAllWindows()
C++
Mat img = imread("test.jpg");

//Print the height and width of the image
cout << "Width : " << img.size().width << endl;
cout << "Height: " << img.size().height << endl;
cout << "Channels: " << img.channels() << endl;

// Display image
imshow("Image", img);
waitKey(0);
destroyAllWindows();
上面的代码读取并显示图像及其尺寸。维度不仅包括二维矩阵的宽度和高度,还包括通道数(例如,RGB 图像有 3 个通道——红色、绿色和蓝色)。
让我们尝试裁剪图像中包含花的部分。
Python
cropped_image = img[80:280, 150:330] # Slicing to crop the image

# Display the cropped image
cv2.imshow("cropped", cropped_image)
cv2.waitKey(0)
cv2.destroyAllWindows()
C++
Mat crop = img(Range(80,280),Range(150,330)); // Slicing to crop the image

// Display the cropped image
imshow("Cropped Image", crop);

waitKey(0);
destroyAllWindows();
return 0;
python如何裁切照片?在 Python 中,你可以使用与 NumPy 数组切片相同的方法来裁剪图像。要对数组进行切片,你需要指定第一维和第二维的开始和结束索引。
- 第一个维度始终是图像的行数或高度。
- 第二个维度是列数或图像的宽度。
按照惯例,二维数组的第一维表示数组的行(其中每一行表示图像的 y 坐标)。如何切片 NumPy 数组?查看此示例中的语法:
cropped = img[start_row:end_row, start_col:end_col]
在 C++ 中,我们使用该Range()函数来裁剪图像。
- 与 Python 一样,它也适用于切片。
- 在这里,图像也按照上述相同的约定作为 2D 矩阵读入。
以下是裁剪图像的 C++ 语法:
img(Range(start_row, end_row), Range(start_col, end_col))
python照片裁切:使用裁剪将图像分成小块
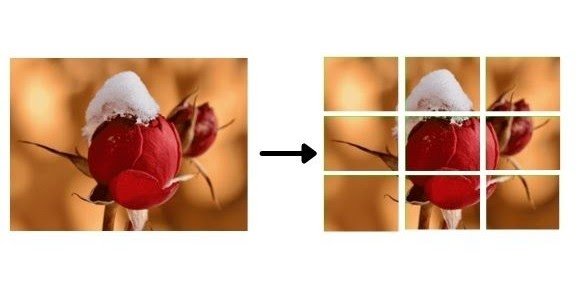
如何使用OpenCV裁剪图像?在 OpenCV 中裁剪的一个实际应用可以是将图像分成更小的块。使用循环从图像中裁剪出一个片段。首先从图像的形状中获取所需补丁的高度和宽度。
Python
img =  cv2.imread("test_cropped.jpg")
image_copy = img.copy()
imgheight=img.shape[0]
imgwidth=img.shape[1]
C++
Mat img = imread("test_cropped.jpg");
Mat image_copy = img.clone();
int imgheight = img.rows;
int imgwidth = img.cols;加载高度和宽度以指定需要裁剪较小补丁的范围。为此,请使用range()Python 中的函数。现在,使用两个for循环进行裁剪:
- 一个用于宽度范围
- 其他为高度范围
我们使用高度和宽度分别为 76 像素和 104 像素的补丁。内循环和外循环的步幅(我们在图像中移动的像素数)等于我们正在考虑的补丁的宽度和高度。
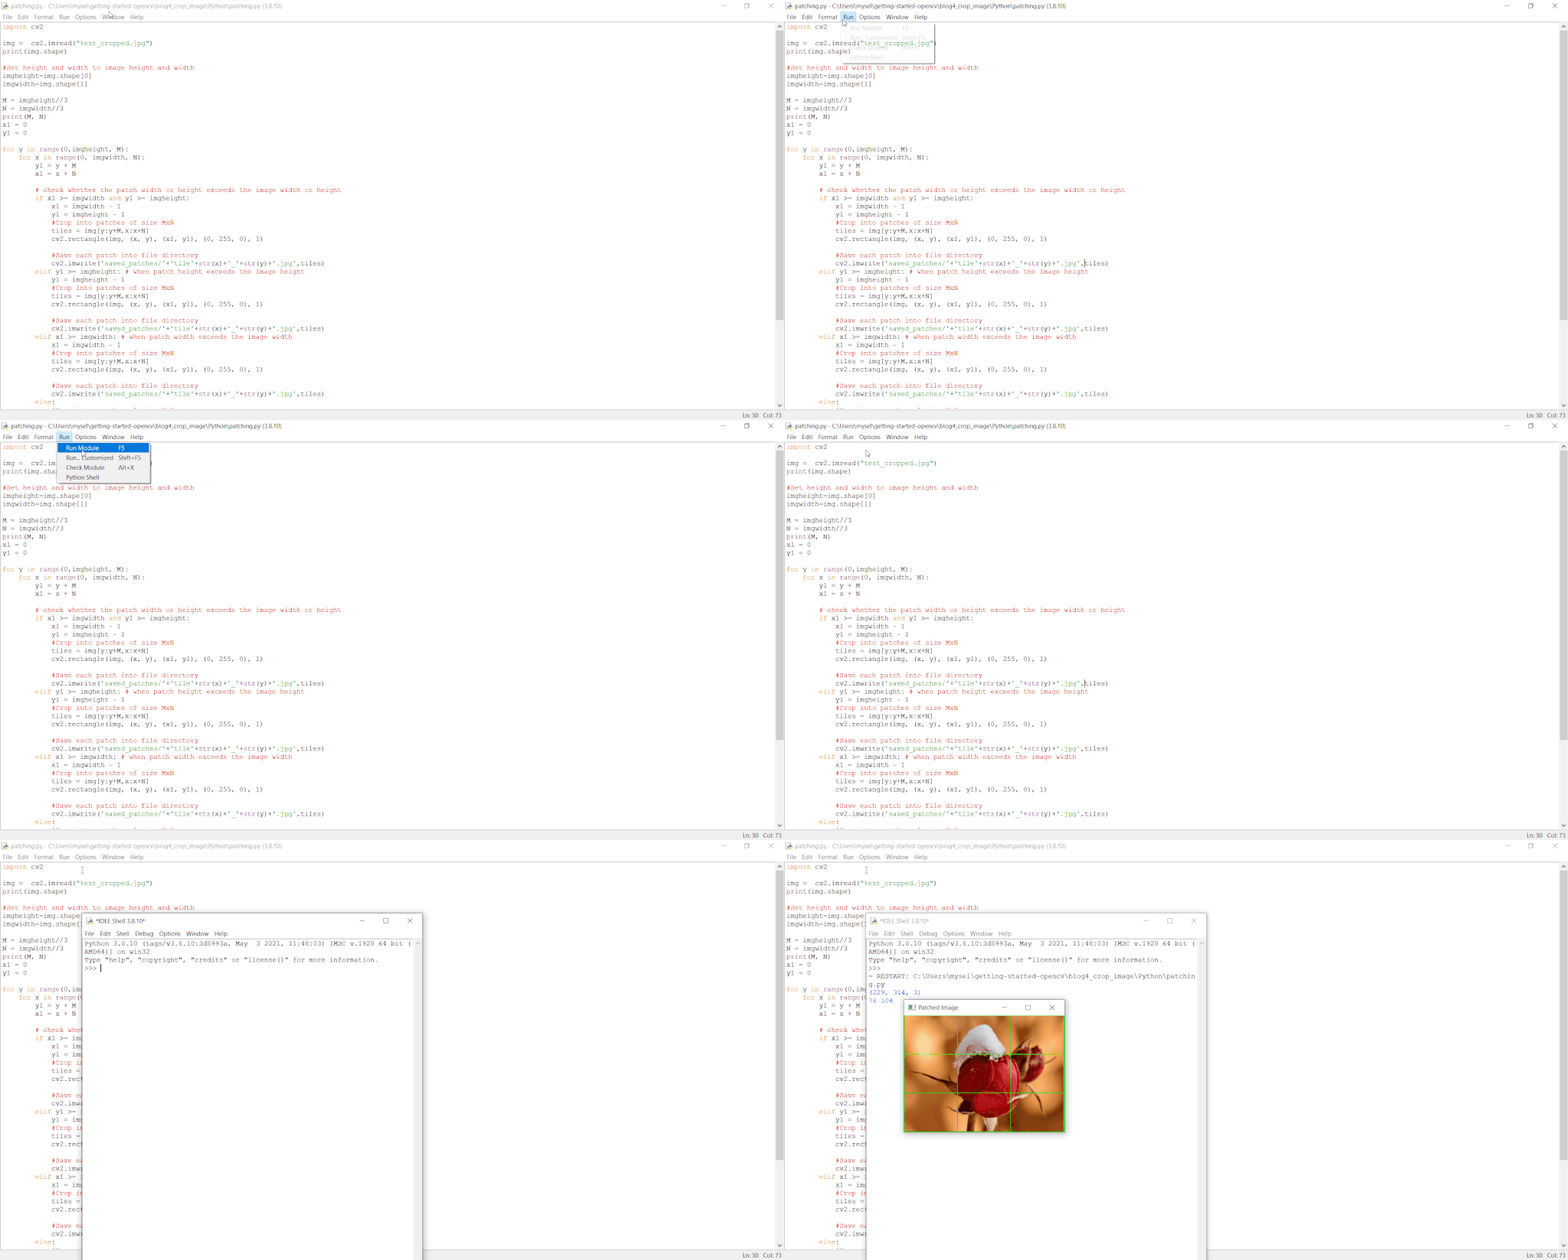
python照片裁切示例- python代码:
M = 76
N = 104
x1 = 0
y1 = 0

for y in range(0, imgheight, M):
    for x in range(0, imgwidth, N):
        if (imgheight - y) < M or (imgwidth - x) < N:
            break

        y1 = y + M
        x1 = x + N

        # check whether the patch width or height exceeds the image width or height
        if x1 >= imgwidth and y1 >= imgheight:
            x1 = imgwidth - 1
            y1 = imgheight - 1
            #Crop into patches of size MxN
            tiles = image_copy[y:y+M, x:x+N]
            #Save each patch into file directory
            cv2.imwrite('saved_patches/'+'tile'+str(x)+'_'+str(y)+'.jpg', tiles)
            cv2.rectangle(img, (x, y), (x1, y1), (0, 255, 0), 1)
        elif y1 >= imgheight: # when patch height exceeds the image height
            y1 = imgheight - 1
            #Crop into patches of size MxN
            tiles = image_copy[y:y+M, x:x+N]
            #Save each patch into file directory
            cv2.imwrite('saved_patches/'+'tile'+str(x)+'_'+str(y)+'.jpg', tiles)
            cv2.rectangle(img, (x, y), (x1, y1), (0, 255, 0), 1)
        elif x1 >= imgwidth: # when patch width exceeds the image width
            x1 = imgwidth - 1
            #Crop into patches of size MxN
            tiles = image_copy[y:y+M, x:x+N]
            #Save each patch into file directory
            cv2.imwrite('saved_patches/'+'tile'+str(x)+'_'+str(y)+'.jpg', tiles)
            cv2.rectangle(img, (x, y), (x1, y1), (0, 255, 0), 1)
        else:
            #Crop into patches of size MxN
            tiles = image_copy[y:y+M, x:x+N]
            #Save each patch into file directory
            cv2.imwrite('saved_patches/'+'tile'+str(x)+'_'+str(y)+'.jpg', tiles)
            cv2.rectangle(img, (x, y), (x1, y1), (0, 255, 0), 1)
python照片裁切C++代码
int M = 76;
int N = 104;

int x1 = 0;
int y1 = 0;
for (int y = 0; y<imgheight; y=y+M)
{
    for (int x = 0; x<imgwidth; x=x+N)
    {
        if ((imgheight - y) < M || (imgwidth - x) < N)
        {
            break;
        }
        y1 = y + M;
        x1 = x + N;
        string a = to_string(x);
        string b = to_string(y);

        if (x1 >= imgwidth && y1 >= imgheight)
        {
            x = imgwidth - 1;
            y = imgheight - 1;
            x1 = imgwidth - 1;
            y1 = imgheight - 1;

            // crop the patches of size MxN
            Mat tiles = image_copy(Range(y, imgheight), Range(x, imgwidth));
            //save each patches into file directory
            imwrite("saved_patches/tile" + a + '_' + b + ".jpg", tiles);
            rectangle(img, Point(x,y), Point(x1,y1), Scalar(0,255,0), 1);
        }
        else if (y1 >= imgheight)
        {
            y = imgheight - 1;
            y1 = imgheight - 1;

            // crop the patches of size MxN
            Mat tiles = image_copy(Range(y, imgheight), Range(x, x+N));
            //save each patches into file directory
            imwrite("saved_patches/tile" + a + '_' + b + ".jpg", tiles);
            rectangle(img, Point(x,y), Point(x1,y1), Scalar(0,255,0), 1);
        }
        else if (x1 >= imgwidth)
        {
            x = imgwidth - 1;
            x1 = imgwidth - 1;

            // crop the patches of size MxN
            Mat tiles = image_copy(Range(y, y+M), Range(x, imgwidth));
            //save each patches into file directory
            imwrite("saved_patches/tile" + a + '_' + b + ".jpg", tiles);
            rectangle(img, Point(x,y), Point(x1,y1), Scalar(0,255,0), 1);
        }
        else
        {
            // crop the patches of size MxN
            Mat tiles = image_copy(Range(y, y+M), Range(x, x+N));
            //save each patches into file directory
            imwrite("saved_patches/tile" + a + '_' + b + ".jpg", tiles);
            rectangle(img, Point(x,y), Point(x1,y1), Scalar(0,255,0), 1);
        }
    }
}接下来,使用该imshow()功能显示图像补丁。使用imwrite()函数将其保存到文件目录。
Python
#Save full image into file directory
cv2.imshow("Patched Image",img)
cv2.imwrite("patched.jpg",img)

cv2.waitKey()
cv2.destroyAllWindows()
C++
imshow("Patched Image", img);
imwrite("patched.jpg",img);
waitKey();
destroyAllWindows();
python照片裁切示例:下面的 GIF 演示了执行将图像划分为补丁的代码的过程:

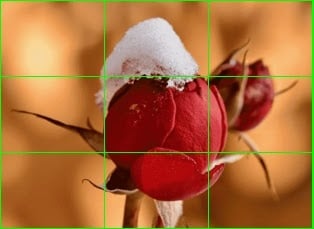
覆盖有矩形块的最终图像将如下所示:

下图显示了保存到磁盘的单独图像补丁。

如何使用OpenCV裁剪图像?使用裁剪的一些有趣应用
- 你可以使用裁剪从图像中提取感兴趣的区域并丢弃不需要使用的其他部分。
- 你可以从图像中提取补丁来训练基于补丁的神经网络。
有趣的 Streamlit Web 应用程序
使用 Streamlit 的裁剪应用程序:
- 使用该应用程序从需要裁剪的文件目录中上传任何图像。
- 然后通过指定其尺寸来裁剪图像。
你可以在此处试用 Streamlit Web 应用程序。
概括
python如何裁切照片?在这篇python照片裁切的文章中,我们讨论了在 C++ 和 Python 中裁剪图像的基本语法。裁剪操作使用切片进行,即我们指定高度和宽度或要裁剪的区域作为图像矩阵的维度。因此,可以将生成的图像保存在新矩阵中或通过更新现有矩阵。然后可以使用 OpenCVimshow()函数将该矩阵显示为图像,或者可以使用 OpenCV函数将其作为文件写入磁盘imwrite()。我们还讨论了如何将图像划分为更小的块以及围绕它的一些应用程序。

