
如果你想创建一个机器学习模型,但又说你没有一台电脑可以承担工作,谷歌Colab是你的平台。即使你有一个GPU或者一台好的计算机,使用anaconda创建一个本地环境并安装软件包和解决安装问题也是一个麻烦。
Colaboratory是Google提供的免费的Jupyter笔记本环境, 你可以在其中使用免费的GPU和TPU, 它们可以解决所有这些问题。
入门
要开始使用Colab, 你首先需要登录到你的Google帐户, 然后转到此链接https://colab.research.google.com.
打开Jupyter笔记本:
打开网站后, 你会看到一个包含以下标签的弹出窗口–
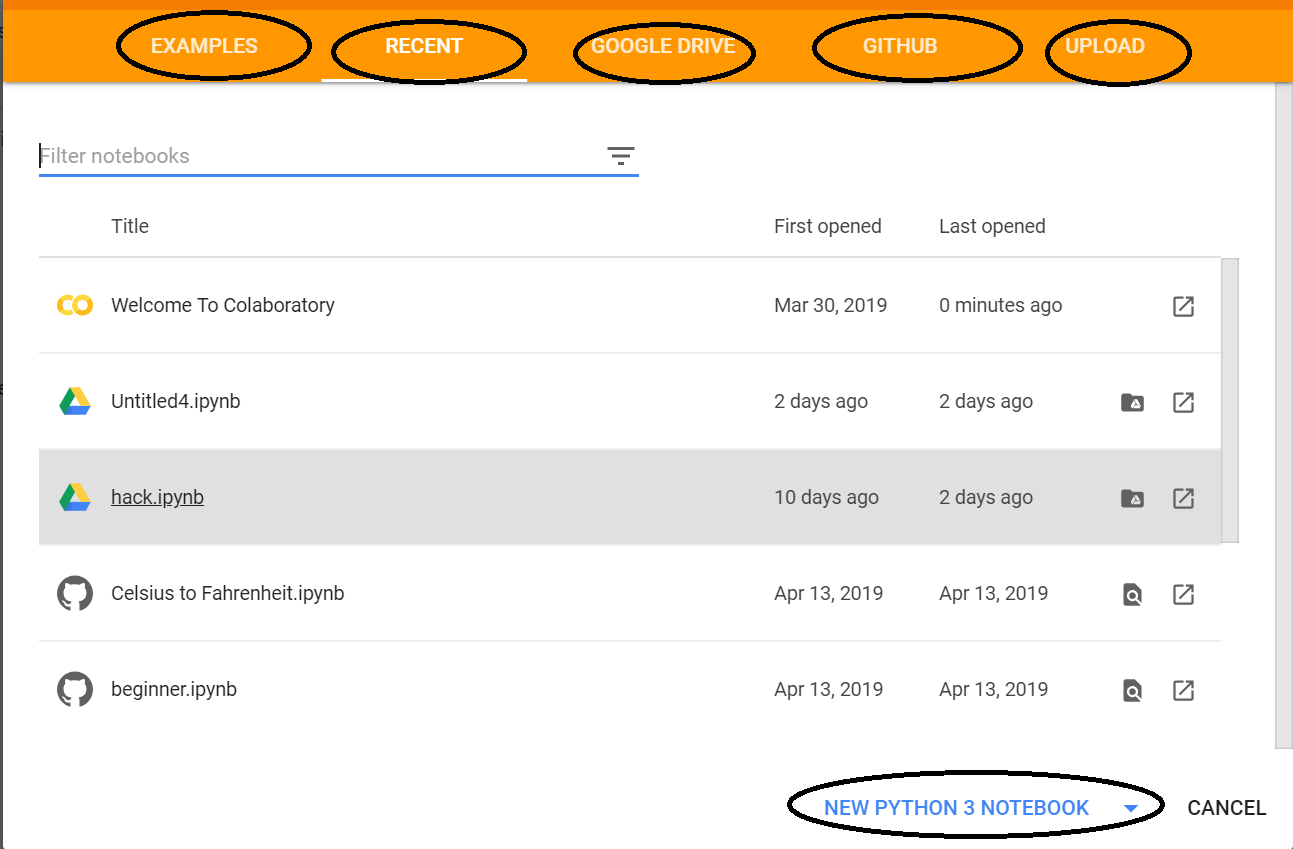
示例:包含许多Jupyter笔记本的各种示例。
最近:你最近使用过的Jupyter笔记本。
GOOGLE DRIVE:你的Google云端硬盘中的Jupyter笔记本。
GITHUB:你可以从GitHub添加Jupyter笔记本, 但首先需要将Colab与GitHub连接。
上载:从本地目录上载。
否则你可以创建一个新的Jupyter笔记本通过单击右下角的New Python3 Notebook或New Python2 Notebook。
笔记本的说明:
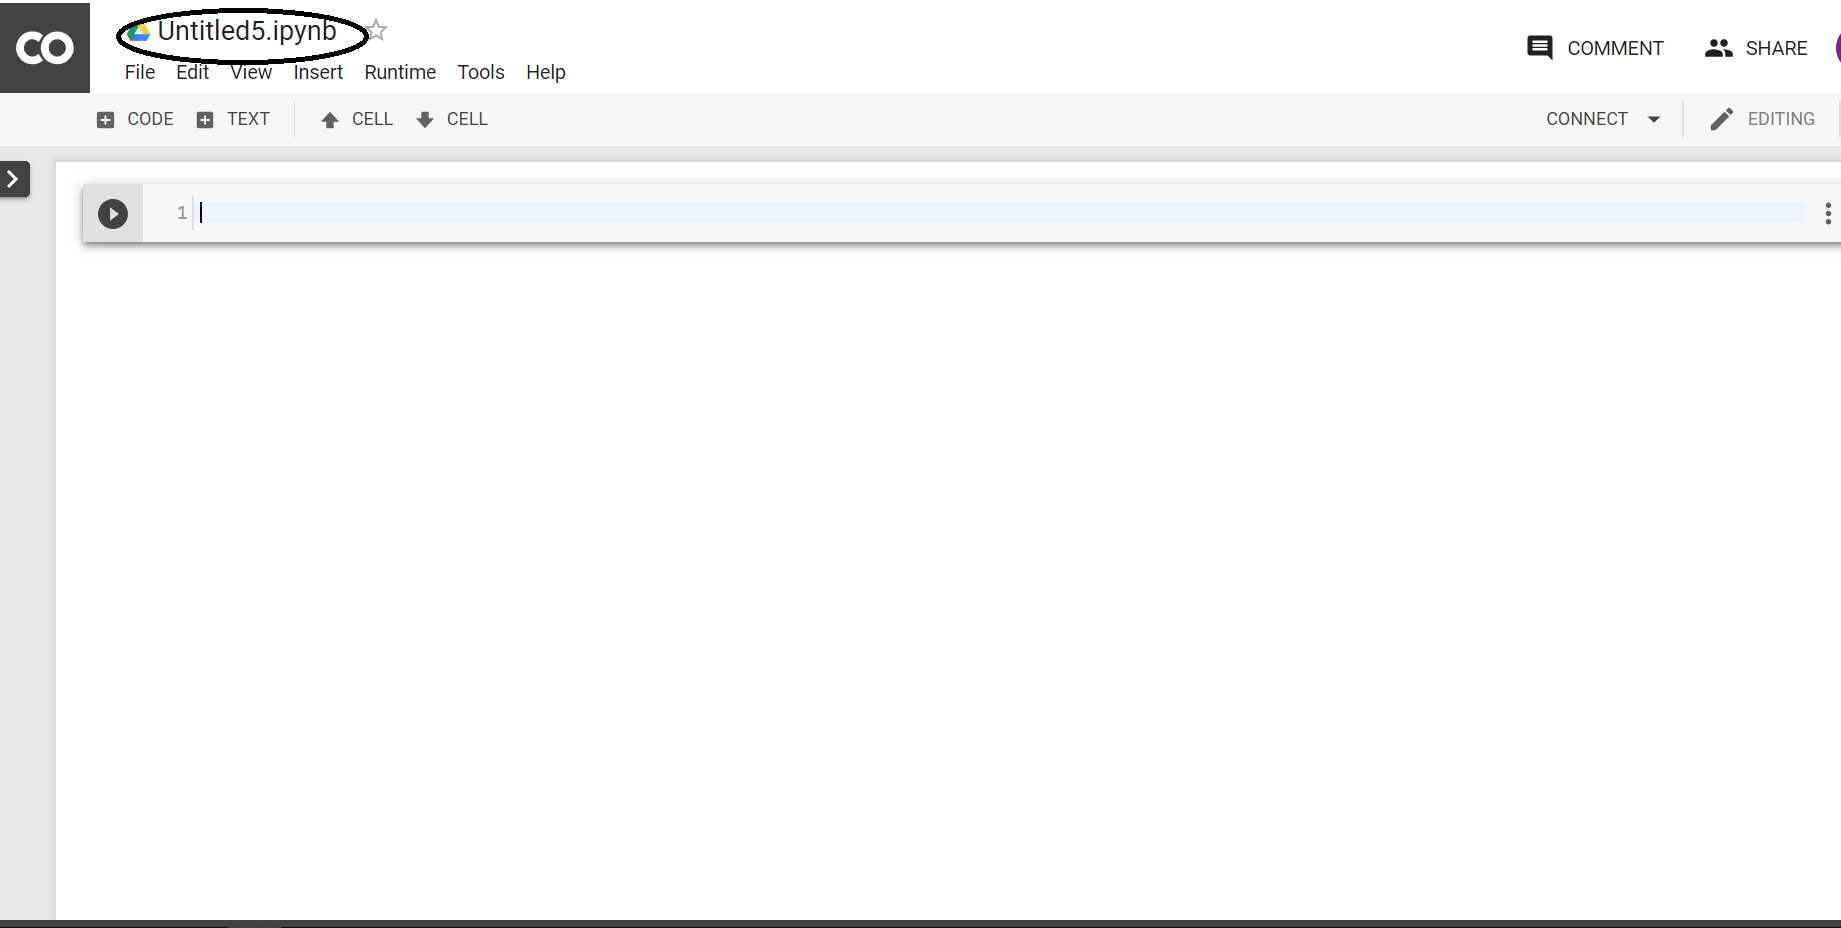
在创建新笔记本时,它将创建一个带有Untitled0的木星笔记本。并将其保存到您的谷歌驱动器中的一个名为Colab笔记本的文件夹中。现在,因为它本质上是一个木星笔记本,木星笔记本的所有命令都将在这里工作。不过,你可以参考细节开始与木星笔记本。
让我们来谈谈这里的不同之处。
更改运行时环境:
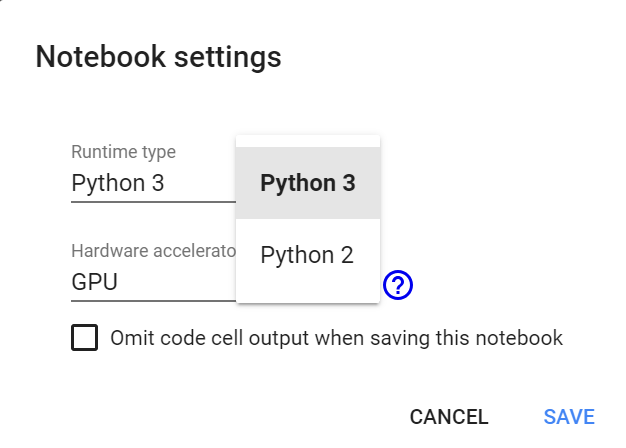
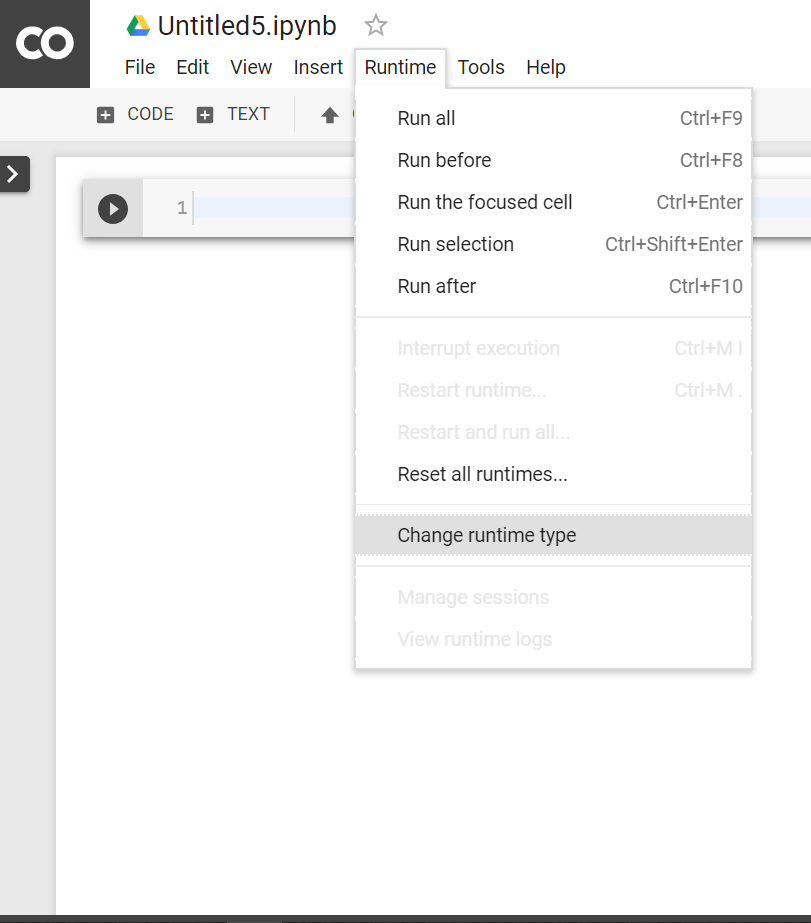
点击“运行时”下拉菜单。选择“更改运行时类型”。从“运行时类型”下拉菜单中选择python2或3。

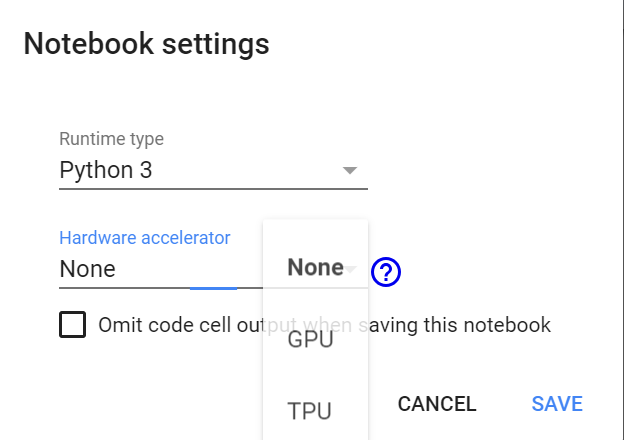
使用GPU和TPU:
点击“运行时”下拉菜单。选择“更改运行时类型”。现在在“硬件加速器”下拉菜单中选择任何你想要的(GPU, CPU, None)。
验证GPU:
import tensorflow as tf
tf.test.gpu_device_name()
如果已连接gpu, 则将输出以下内容–
'/device:GPU:0'否则, 将输出以下内容
''验证TPU:
import os

if 'COLAB_TPU_ADDR' not in os.environ:
   print ( 'Not connected to TPU' )
else :
   print ( "Connected to TPU" )
如果已连接GPU, 则会输出以下内容
Connected to TPU否则, 将输出以下内容
Not connected to TPU安装Python软件包–
使用可以使用pip安装任何包。例如:
! pip install pandas克隆GitHub存储库:
使用git克隆命令。例如:
! git clone https: //github.com /souvik3333 /Testing - and - Debugging - Tools上传文件:
from google.colab import files
uploaded = files.upload()
选择"选择文件"并上传所需的文件。启用第三方Cookie(如果已禁用)。

然后, 你可以将其保存在数据框中。
import io
df2 = pd.read_csv(io.BytesIO(uploaded[ 'file_name.csv' ]))
通过挂载Google云端硬盘上传文件:
要将驱动器安装在" mntDrive"文件夹中, 请执行以下操作–
from google.colab import drive
drive.mount( '/mntDrive' )
然后, 你将看到一个链接, 单击链接, 然后允许访问, 复制弹出的代码, 并将其粘贴到"输入你的授权代码:"。
现在, 要查看你的Google驱动器中的所有数据, 你需要执行以下操作:
! ls "/mntDrive/My Drive"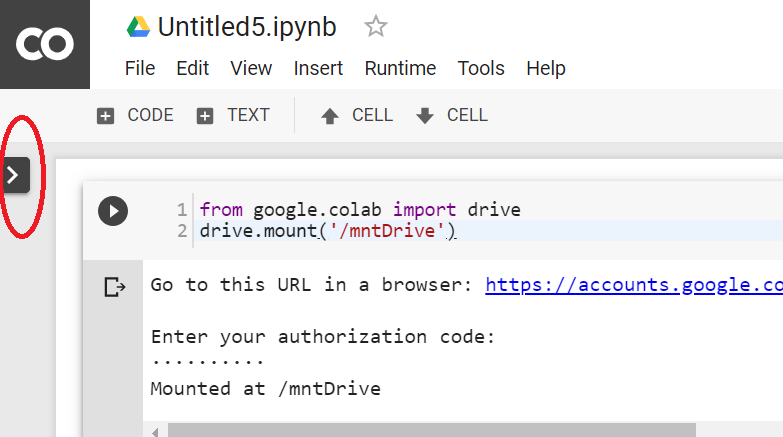
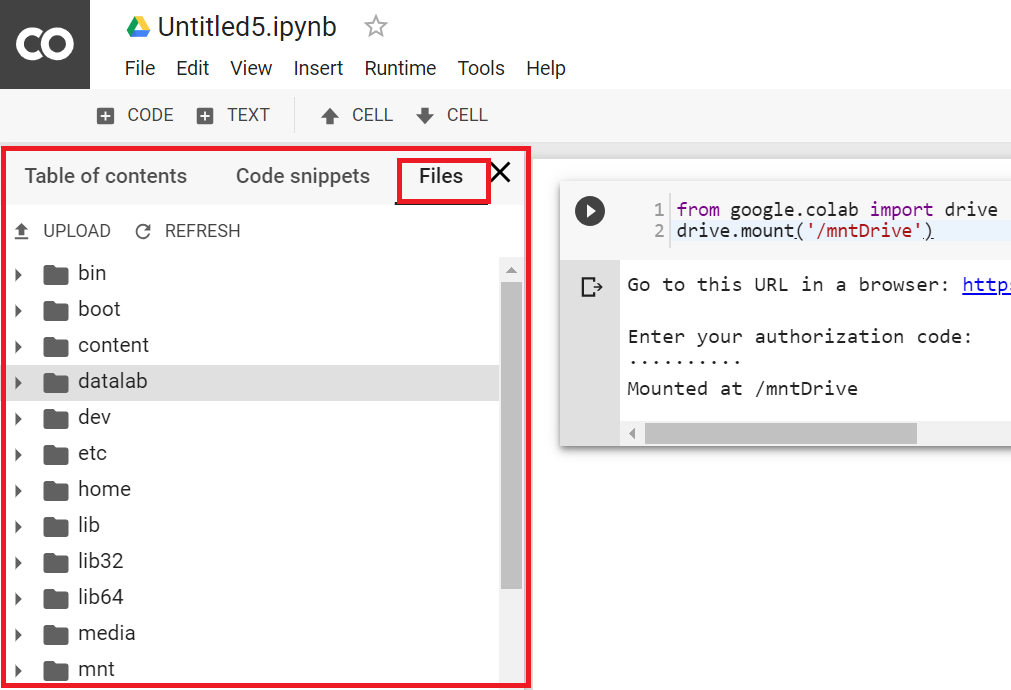
文件层次结构:
你还可以通过单击控制按钮(CODE, TEXT, CELL)左上方的">"来查看文件层次结构。

下载文件:
假设你要下载" file_name.csv"。你可以通过执行以下操作将文件复制到你的Google驱动器(在"数据"文件夹中, 你需要在Google驱动器中创建"数据"文件夹):
cp file_name.csv "/mntDrive/My Drive/data/renamed_file_name.csv"该文件将以" renamed_file_name.csv"名称保存在"数据"文件夹中。现在, 你可以从那里直接下载, 或者, 你可以打开文件层次结构, 然后右键单击将提供下载选项。
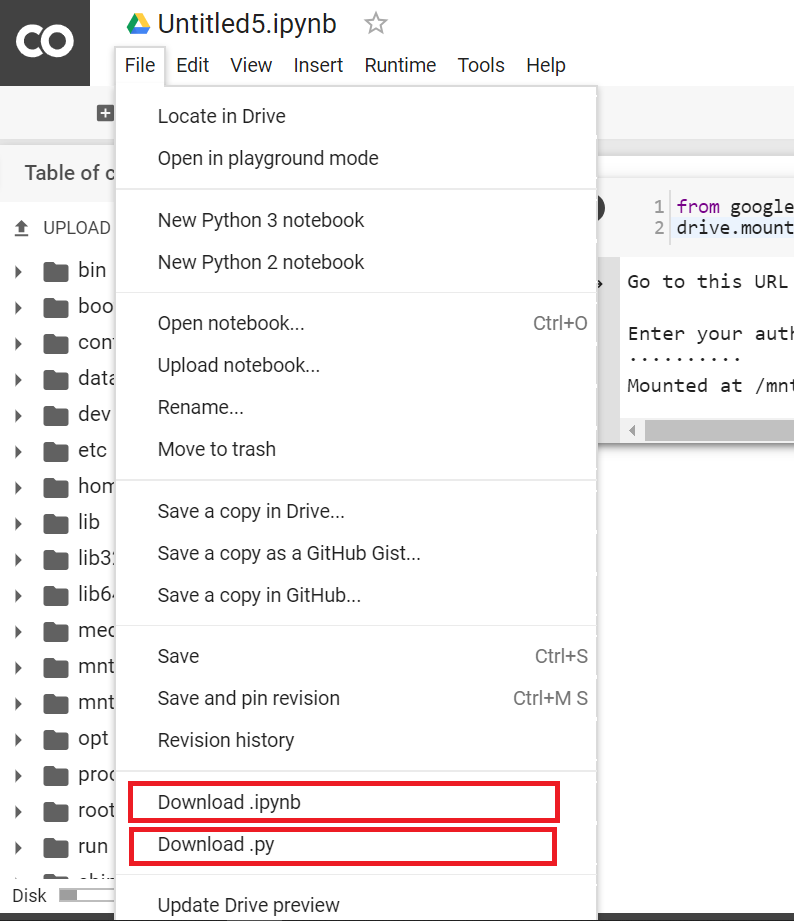
下载Jupyter Notebook:
点击左上角的“文件”下拉菜单。选择“download.ipynb”或“download.py”
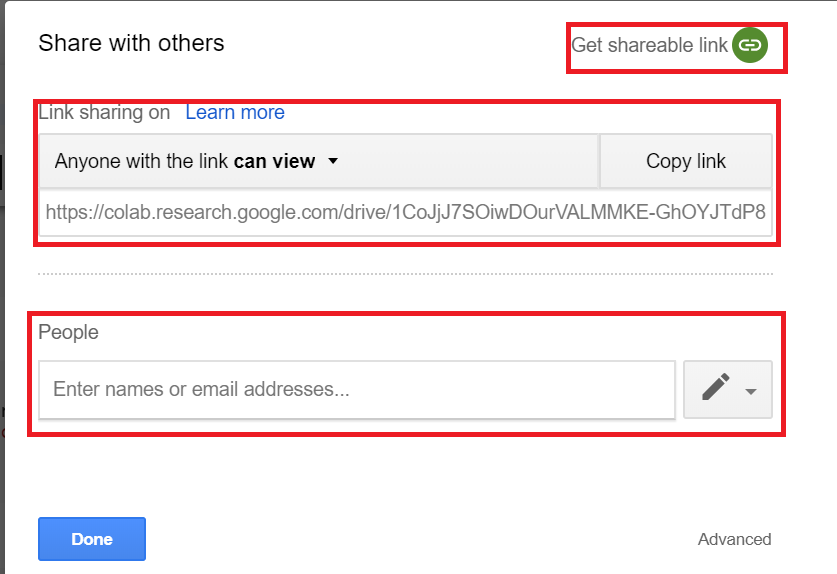
分享Jupyter笔记本:
你可以通过添加其他电子邮件地址或创建可共享的链接来共享笔记本。

首先, 你的面试准备可通过以下方式增强你的数据结构概念:Python DS课程。

