跟踪路由Linux中的命令显示了数据包到达主机的路径。当你想了解路由以及数据包经过的所有跃点时, 此命令很有用。下图描绘了如何使用traceroute命令从本地计算机访问Google(172.217.26.206)主机, 并且还打印有关其之间访问的所有跃点的详细信息。
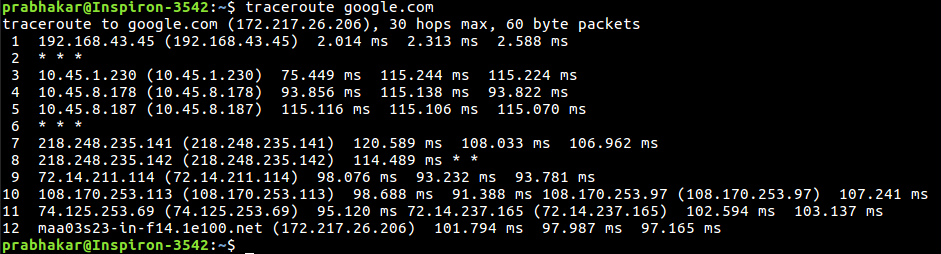
第一列对应于跳数。第二列表示该跃点的地址, 此后, 你会看到三个以空格分隔的时间(以毫秒为单位)。跟踪路由命令将三个数据包发送到跃点, 每个时间是指数据包到达跃点所花费的时间。
语法如下:
traceroute [options] host_Address [pathlength]选项:
-4选项:
使用ip版本4, 即使用IPv4
语法如下:
$ traceroute -4 10 google.com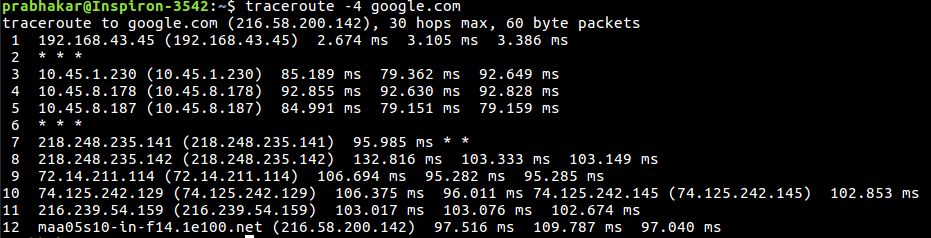
-6选项:
使用ip版本6, 即使用IPv6
语法如下:
$ traceroute -6 10 google.com
-F选项:
不要对数据包进行分段。
语法如下:
$ traceroute -F google.com
-f first_ttl选项:
从first_ttl跳开始(而不是从1开始)。
语法如下:
$ traceroute -f 10 google.com
-g门选项:
将数据包通过网关。
语法如下:
$ traceroute -g 192.168.43.45 google.com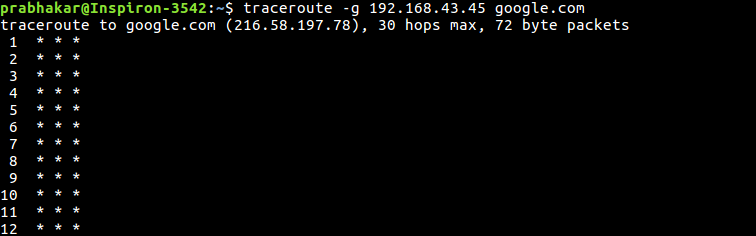
-m max_ttl选项:
设置数据包到达目的地的最大跳数。默认值为30。
语法如下:
$traceroute -m 5 google.com
-n选项:
不要将IP地址解析为其域名。
语法如下:
$traceroute -n google.com
-p端口选项:
设置要使用的目标端口。默认值为33434。
语法如下:
$traceroute -p 20292 google.com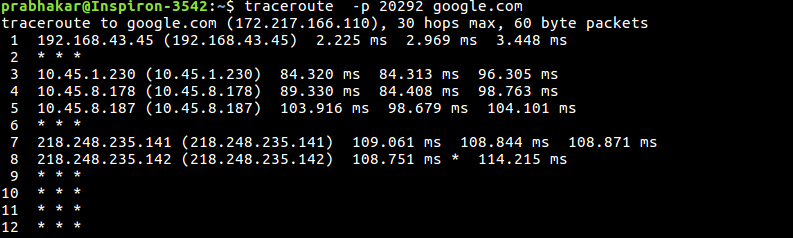
-q nqueries选项:
设置每跳的探测数。默认值为3。
语法如下:
$traceroute -q 1 google.com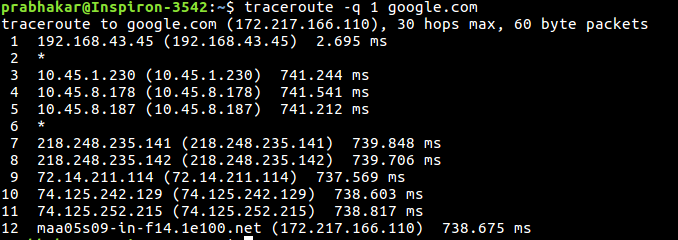
packetlen选项:
完整的数据包长度。默认len是60个字节的数据包。
语法如下:
$traceroute google.com 100
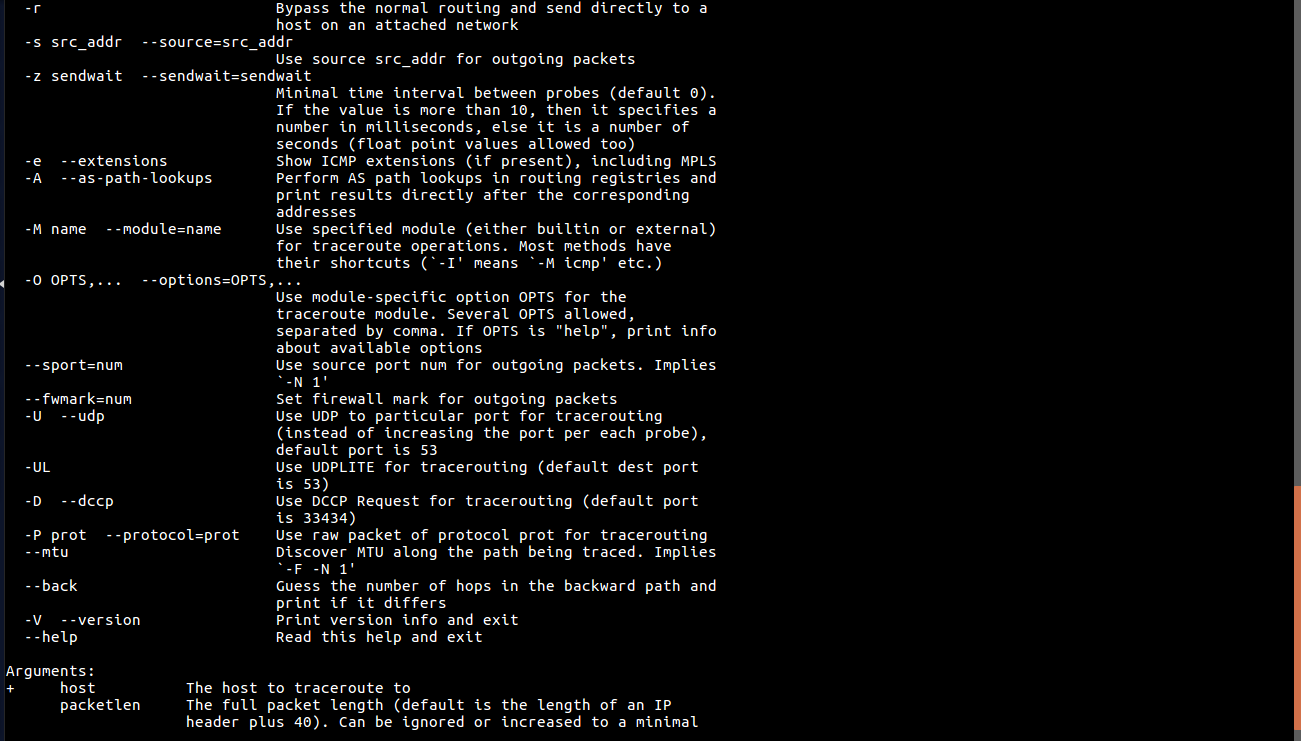
-救命:
显示帮助消息并退出。
语法如下:
$traceroute --help